Have you ever experienced an overloaded Send Items folder in Outlook? This is a hack I always implement to help me organize my email, instead of having all my messages in Send Items.
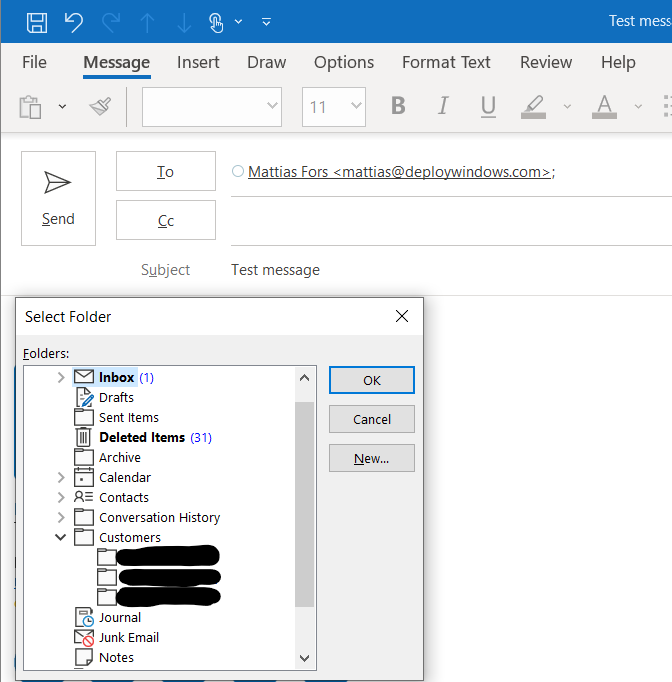
So whenever I send an email I receive a popup asking me what folder to organize the message in.
How to implement
First fire up Outlook, and press ALT+F11. This will open up Visual Basic for Applications. Browse down to Project 1 > Microsoft Outlook > ThisOutlookSession
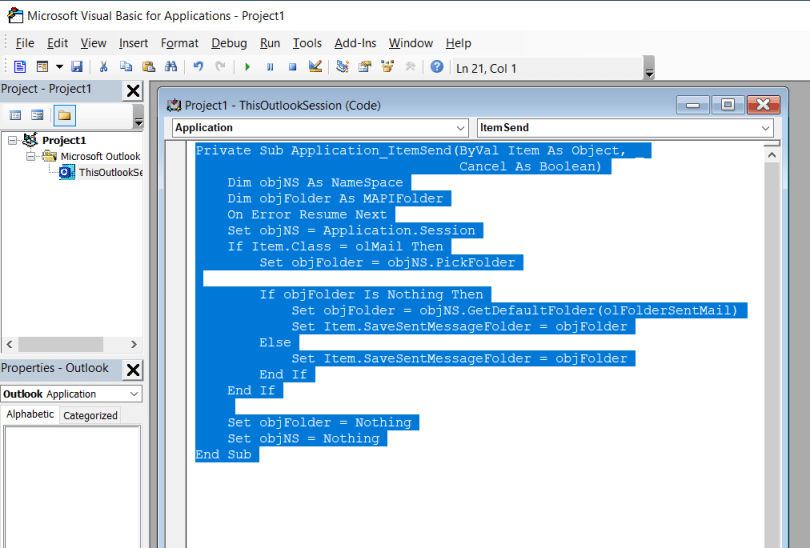
Double click ThisOutlookSession and paste this
Private Sub Application_ItemSend(ByVal Item As Object, _
                                 Cancel As Boolean)
    Dim objNS As NameSpace
    Dim objFolder As MAPIFolder
    On Error Resume Next
    Set objNS = Application.Session
    If Item.Class = olMail Then
        Set objFolder = objNS.PickFolder

        If objFolder Is Nothing Then
            Set objFolder = objNS.GetDefaultFolder(olFolderSentMail)
            Set Item.SaveSentMessageFolder = objFolder
        Else
            Set Item.SaveSentMessageFolder = objFolder
        End If
    End If

    Set objFolder = Nothing
    Set objNS = Nothing
End Sub
Close the window and save the project.
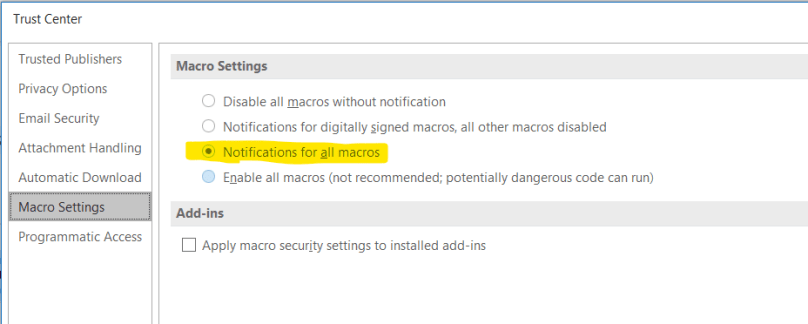
What next is to allow unsigned macro to run (actually this step is not recommendend due to the security since this will allow all unsigned macros to run, signing the code is another story..)
In Outlook open File > Options and Trust Center Settings and change Macro Settings to Notifications for all macros
Restart Outlook and start organizing your outgoing emails!

Leave a comment